I’ve built more bar stools than I care to count, and I can tell you this: you don’t need to drop hundreds of dollars per seat to get something that looks good.
You’re probably here because you saw the price tags at furniture stores and thought there has to be a better way. There is.
How to make bar stool ththomideas starts with understanding that clean lines and simple design actually make the build easier, not harder. The minimalist approach means fewer complicated cuts and joints.
Here’s what I’m going to show you: a complete plan for building bar stools that look like they came from a high-end showroom. We’re talking about pieces that fit your space perfectly because you made them to your exact measurements.
I’ve spent years working on DIY projects and testing what actually works for people who aren’t professional woodworkers. This guide comes from that experience. Real builds, real mistakes learned from, real solutions.
You’ll get a full materials list, step-by-step instructions, and the kind of details that keep beginners from getting stuck halfway through.
No fancy tools you’ll never use again. No techniques that take years to master.
Just a straightforward process that gets you from raw materials to finished bar stools you’ll be proud to show off.
Deconstructing the THOM Aesthetic: Core Design Principles
Let me show you what makes THOM design actually work.
It’s not about following trends or copying what you see in magazines. It’s about understanding a few core ideas that make everything else fall into place.
Simplicity and Function
Every piece should earn its place.
That’s the rule I follow when I look at THOM design. Clean lines. No clutter. If something doesn’t serve a purpose, it doesn’t belong there.
You won’t find decorative flourishes just for the sake of decoration. A leg tapers because it needs to support weight efficiently. A backrest curves because that’s how your body actually sits.
Natural Materials
Wood is where THOM design really comes alive.
Oak, ash, walnut. These materials bring warmth that you can’t fake with paint or veneer. The grain tells a story. The texture invites you to touch it.
Leather and metal play supporting roles. They complement the wood without fighting for attention. When you combine them right, each material makes the others look better.
Structural Honesty
Here’s what separates THOM from everything else.
The joints aren’t hidden. The supports are visible. The way a piece is built becomes part of what makes it beautiful.
Think about mortise and tenon joints that you can actually see. Or metal brackets that hold a shelf in place while adding visual interest. The construction is the design.
Inspiration for Your Build
So how does this translate when you’re figuring out how to make bar stool ththomideas come to life?
Start with tapered legs. They’re stronger at the top where they need to be and lighter at the bottom. Simple geometry that works.
Add a round or square seat in solid wood. No padding needed if you shape it right (though a thin leather cushion never hurts).
Keep the frame visible and sturdy. Let people see how the pieces connect. That’s where the honesty comes in.
For more inspiration on bringing these concepts into your space, check out home ideas Ththomideas.
Your Project Blueprint: Tools & Materials Checklist
You know what drives me crazy?
Those project guides that tell you to “just grab some wood” and figure it out as you go. Then you’re standing in the lumber aisle at 9 AM on a Saturday, completely lost, wondering if pine will actually hold your weight.
I’ve been there. It’s frustrating.
So let’s talk about what you actually need to build a solid bar stool. No guessing games.
The Lumber You Need
For the legs, grab 2×2 boards. They’re strong enough without looking bulky.
The seat? Go with a 2×10. It gives you enough width to sit comfortably (because nobody wants a stool that feels like a balance beam).
Pine works fine if you’re on a budget. But if you want something that’ll last and look better over time, spend a bit more on oak or maple.
For a standard counter-height stool, you’re looking at 24 to 26 inches from floor to seat. Measure your counter first though. Nothing’s worse than building the whole thing only to realize it’s too short.
Tools That Actually Matter
Here’s what you need. A circular saw or miter saw for cuts. A power drill for assembly. An orbital sander because hand-sanding a whole stool will make you quit halfway through.
Don’t forget measuring tape, wood clamps, and a speed square. That square will save you from wobbly legs.
Hardware and Finishing
Pocket-hole screws give you clean joints without visible hardware. Add wood glue for strength.
For finishing, start with 80-grit sandpaper and work up to 220-grit. Then apply your stain or oil. Seal it with polyurethane or wax.
When you learn how to make bar stool ththomideas, having everything ready before you start makes the whole process smoother.
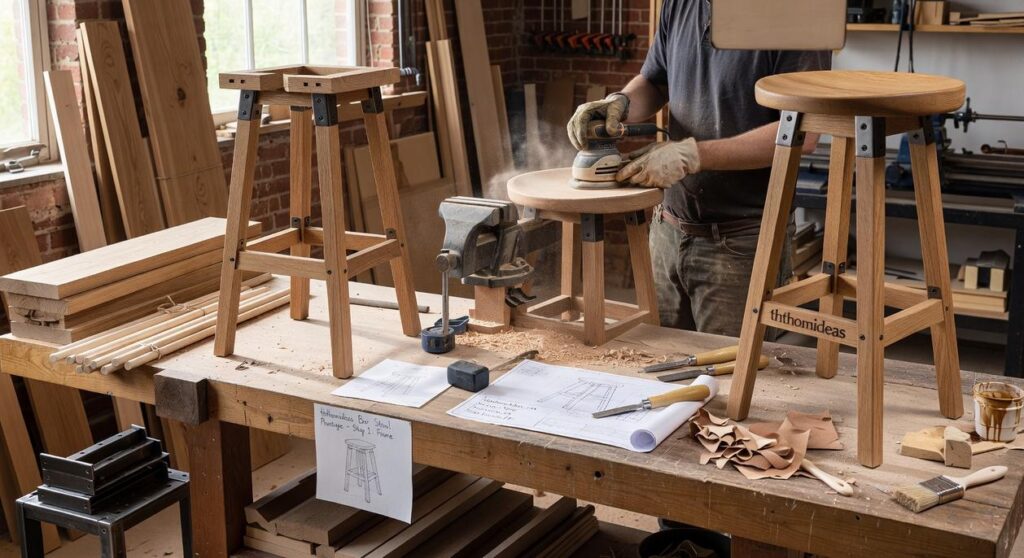
Step-by-Step Guide: Assembling Your Bar Stool
Step 1: Measuring and Cutting
Measure twice, cut once. I can’t stress this enough.
Start with your legs. You need four pieces cut to the exact same length. I’m talking within 1/16 of an inch here. Even a small difference will make your stool wobble, and you’ll hate yourself later. What Paint on Blinds Ththomideas picks up right where this leaves off.
Use a stop block on your miter saw if you have one. It keeps every cut identical without remeasuring.
For the seat blank, add an extra inch to your final dimensions. You’ll trim it down when you shape it. The support braces should be cut at 45-degree angles on the ends so they fit flush between the legs.
Here’s what I do. I lay all four legs side by side after cutting and check the ends. If one looks even slightly off, I recut it.
Step 2: Creating the Seat
The seat is where people notice if you rushed things.
For a round seat, make a simple circle-cutting jig with a piece of scrap plywood and a nail. Pin the center, attach your router or jigsaw to the other end, and swing it around. Takes five minutes to set up and gives you a perfect circle every time.
Going square? That’s easier. Just sand down the top edges at about a 15-degree angle. You want it comfortable to sit on, not sharp enough to cut into your legs. (Trust me on this one.)
Step 3: Assembling the Leg Frame
This is where your stool either comes together or falls apart.
Apply wood glue to your joints first. Then drive in your pocket-hole screws. I recommend two screws per joint if you’re using 2×2 lumber.
Work on a flat surface. Seriously, find the flattest table or floor you have. Attach two legs with a brace, then add the other two legs with the remaining braces.
Before the glue dries, check that everything is square. Use a speed square or just measure diagonally from corner to corner. Both measurements should match. If they don’t, adjust now while you still can.
Let it sit for at least an hour before moving it.
Step 4: Attaching the Seat
Flip your leg frame upside down on your workbench.
Center the seat on top (which is actually the bottom right now). I mark the position with a pencil so it doesn’t shift while I’m working.
Pre-drill your holes from underneath the top braces into the seat. This prevents splitting and gives you better control. Use 2-inch wood screws, four total, one through each brace.
If you want to learn how to make bar stool ththomideas work for your specific space, check out more home tips and tricks ththomideas has to offer.
Tighten everything down firmly but don’t overdo it. You’ll crack the wood if you go too far.
Flip it over and give it a test sit. If it wobbles, one leg is probably shorter than the others.
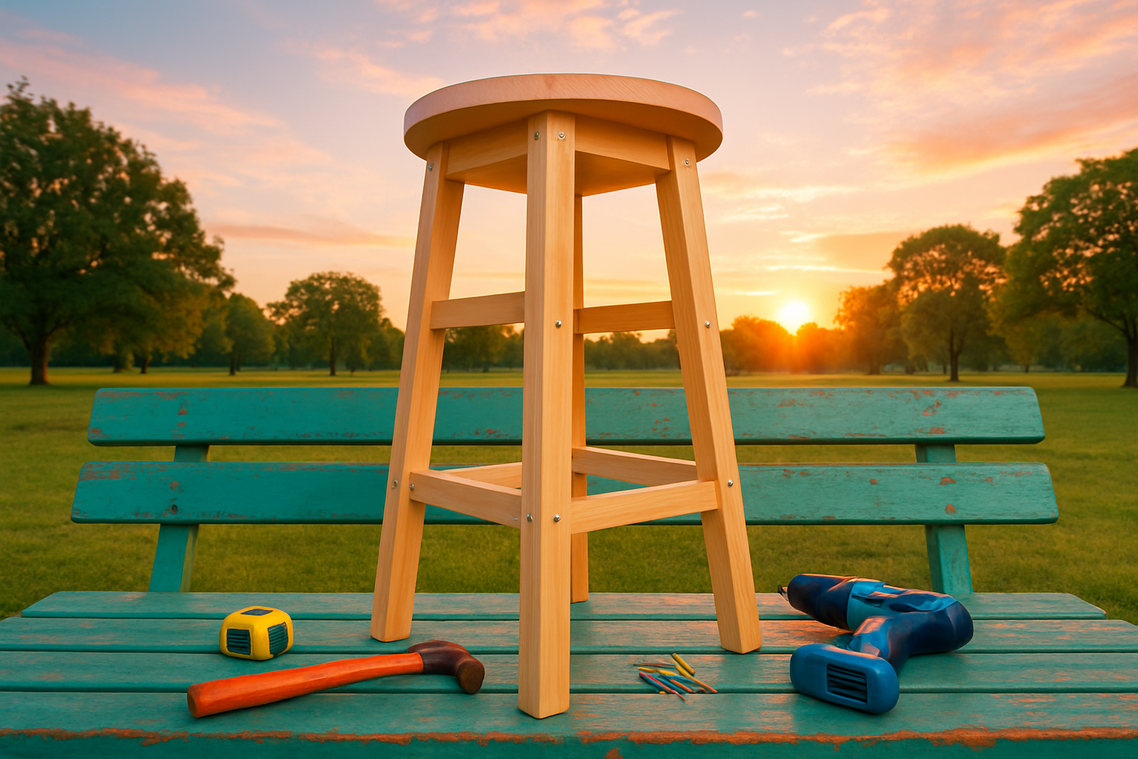
The Final Touch: Finishing and Styling Your Creation
You’ve built the stool. Now let’s make it look like it belongs in a design magazine.
Sanding for a Professional Finish
Start with 80-grit sandpaper. This removes the rough spots and any marks from your tools. Work with the grain, not against it.
Once the surface feels even, move to 120-grit. Then 220-grit for the final pass. Your hand will tell you when it’s ready. If it feels smooth enough to run your palm across without catching, you’re there.
(Pro tip: Wipe the wood with a damp cloth between grits. It raises the grain so you can sand it down for an even smoother finish.)
Choosing a Finish
Natural oil brings out the wood grain. Tung oil or Danish oil soaks in and lets you feel the texture. It’s what I use when I want the wood to look like wood.
But it needs reapplication every year or so. Suggestions for Homes Ththomideas builds on exactly what I am describing here.
Polyurethane gives you a protective shell. Spills wipe right off. It’s tougher and lasts longer. The tradeoff? You lose some of that natural feel.
For how to make bar stool ththomideas that last, I usually split the difference. Oil on the seat where you want warmth. Poly on the legs and stretchers where durability matters.
Styling in Your Home
Place your new stools at a kitchen island with natural stone countertops. The contrast works.
Or pair them with other wood pieces in similar tones. A walnut stool next to a walnut shelf creates flow without trying too hard.
Keep the surrounding area simple. Let the stools be the thing people notice.
More Than a Seat, It’s a Statement
You came here to learn how to make bar stool ththomideas that actually look like they belong in your space.
Now you have everything you need to build them.
No more settling for overpriced options that look like everyone else’s furniture. You’re not buying generic anymore because you’re making something that reflects your style.
This project works because it doesn’t require advanced skills or complicated tools. You focus on clean lines and good materials. That’s the THOM philosophy in action.
The techniques I showed you are simple enough for a weekend build. But the results look professional and last for years.
Here’s what you do next: Get your wood and gather your tools. Pick a design that fits your space. Then start building.
You’ll have a piece of functional art that you made yourself. It’ll be exactly what you wanted because you built it that way.
The bar stools you create will be better than anything you’d find in a store. They’ll be yours.
Start this weekend.
 Vorric Dolthane, the founder of Ththom Ideas, is a dedicated visionary focused on transforming living spaces through thoughtful interior styling and Thom-inspired decor. By combining expert technical insights with practical, everyday setup tips, he empowers others to create homes that are both sophisticated and deeply functional. Under his guidance, the platform has become a go-to resource for modern home inspiration and masterful design concepts.