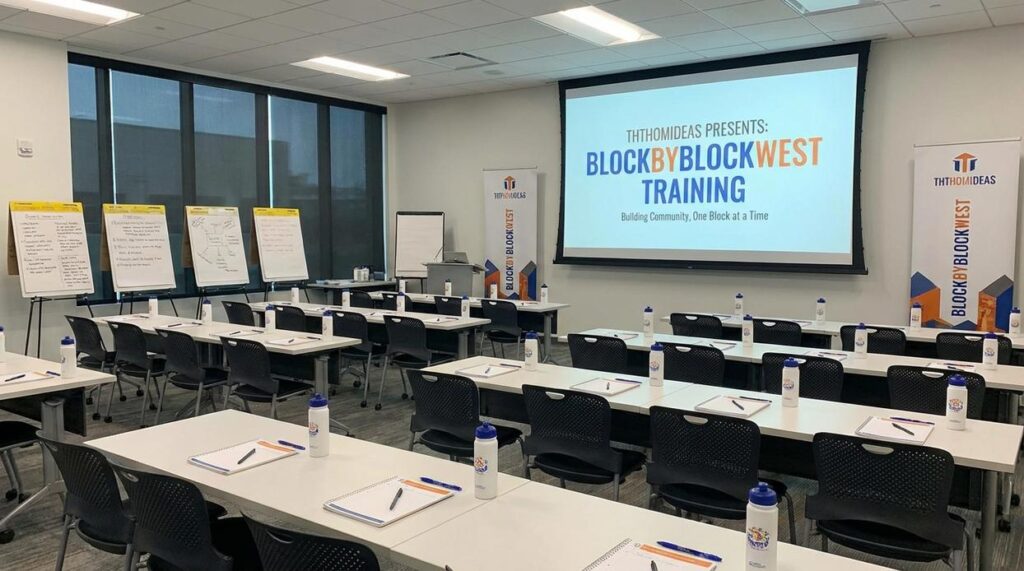
I’ve helped set up dozens of training spaces over the years. This one at the Ththomideas Block By Block West facility is different.
You’re probably looking at an empty room right now and wondering how to turn it into a space where people actually want to learn. I’ve been there.
Here’s the thing: most training rooms fail because they skip the planning phase. They buy furniture, throw in some tech, and hope it works.
That’s not how we’re doing this.
This guide walks you through the entire process of set up training room ththomideas blockbyblockwest. Every step. From measuring your space to choosing the right layout to making sure your budget doesn’t explode.
I’m going to show you how to work around spatial limitations (because there are always limitations). How to meet different training needs in one room. And how to do it without spending money you don’t have.
You’ll get a clear roadmap. No guesswork.
By the time you finish this, you’ll know exactly what to do first, what comes next, and how to avoid the mistakes that waste time and money.
This isn’t about creating a fancy showroom. It’s about building a space that makes training better.
Phase 1: Needs Assessment and Strategic Planning
Before you buy a single chair or move any furniture, you need to figure out what you’re actually building.
I know that sounds obvious. But I’ve seen people skip this step and end up with a room that looks great but doesn’t work for what they need.
Start with the basics. What kind of training will happen here? Lectures where one person talks and everyone listens? Hands-on workshops where people need table space? Maybe collaborative sprints where teams huddle together?
Each format needs different things.
You also need to think about numbers. What’s the maximum capacity you’ll ever need? What’s the average group size? (These two numbers are usually pretty different, and planning for the wrong one costs you money.)
Now here’s where I’ll be honest with you. Picking the optimal spot within your facility isn’t always clear-cut. Sometimes the room that seems perfect has terrible acoustics. Or the space with great natural light is too far from restrooms.
Walk through Block By Block West and really look at your options.
Grab a tape measure and document everything. Where are the windows? Which walls have power outlets? Where do the doors swing? I even mark down where data ports are because moving those later is expensive.
Check the lighting at different times of day if you can. And clap your hands to get a sense of how sound bounces around.
When you set up training room Ththomideas blockbyblockwest, the budget piece matters more than most people think.
Write down every cost you can imagine. Furniture, tech equipment, any electrical work you’ll need. Don’t forget the aesthetic stuff like paint or window treatments.
Then add a contingency fund. Things always cost more than you expect.
Phase 2: Functional Design and Layout
You know that scene in The Office where they’re constantly rearranging the conference room for different meetings?
That’s actually the right idea (even if Michael Scott had no clue what he was doing).
A good training room needs to shift with you. One day it’s lecture style. The next day it’s breakout groups. The day after that, someone needs quiet space to work through a problem alone.
Most people lock themselves into one setup and call it done. They say flexibility doesn’t matter because they know exactly how they’ll use the space.
But here’s what I’ve seen happen.
Your training needs change. New programs come up. Different group sizes walk through the door. And suddenly that fixed setup becomes a problem instead of a solution.
Crafting a Versatile Floor Plan
Start with furniture that moves.
I’m talking about reconfigurable tables that break apart and come back together. Stackable seating you can clear out in five minutes. Mobile whiteboards that roll wherever you need them.
When you set up training room ththomideas blockbyblockwest, think about the transitions between activities. Can you go from rows to circles without a major production? Can two people move things around or does it take your whole team?
The easier it is to change, the more you’ll actually use the space differently.
Creating Functional Zones
Break your room into three areas.
First, you need a presentation zone. This is where instruction happens. Keep it clean and focused so eyes stay forward.
Second, set up breakout pods for group work. These don’t need to be fancy. Just clustered seating that feels separate from the main area.
Third, carve out spots for individual work. Sometimes people need to step away and process on their own.
Use your furniture placement to mark these zones. An area rug under the collaboration space tells people this is where they gather. The way you angle chairs creates natural boundaries without building walls.
Applying Core Interior Styling Principles
Color matters more than you think.
Blues and greens keep people alert without overwhelming them. They create focus. Pair them with neutral bases like gray or beige so the room doesn’t feel like a kindergarten classroom.
Now let’s talk about lighting (because overhead fluorescents are nobody’s friend).
Layer your light sources. Dimmable overheads give you control over the room’s energy. Bright for active sessions, lower for video presentations. Add task lighting at work areas so people aren’t squinting at their notes.
Keep the whole design clean. Clutter kills concentration. Professional doesn’t mean boring. It just means intentional.
Every piece should have a reason for being there.
Phase 3: Equipping the Space with Essential Technology
You’ve got your layout figured out. The furniture’s ordered.
Now comes the part where most people either overspend on gadgets they don’t need or skimp on tech that actually matters.
I was talking to a colleague last week who’d just finished setting up a corporate training room. She told me, “I thought we could get by with the old projector from 2015. Biggest mistake. Half the room couldn’t read the slides.”
That’s the thing about technology in training spaces. You notice it most when it doesn’t work.
Getting Your A/V Right
Start with what people will actually see and hear. This is something I break down further in Ththomideas Ideas for Homes From Thehometrotters.
You need a high-resolution projector or a large interactive display. I lean toward displays these days because they’re brighter and you don’t need to worry about bulb replacements. But projectors work fine if you’ve got good light control.
Audio matters more than you think. A clear sound system with wireless microphones keeps presenters mobile. Nobody wants to stand behind a podium for three hours straight.
And video conferencing equipment? Not optional anymore. Even if you’re running in-person sessions, someone will eventually dial in remotely.
Power and Connectivity That Actually Works
Here’s what a facilities manager once told me: “We installed eight outlets in our training room. Turns out we needed twenty.”
Make sure you have robust, high-speed Wi-Fi that covers every corner. Dead zones kill productivity fast.
Install power outlets and USB charging stations where people actually sit. Not just along the walls. Under tables, in floor boxes, wherever makes sense for your setup.
When you set blockbyblockwest room ththomideas properly, you’re thinking about how people move and work in the space.
Storage for Training Materials
You’ll need somewhere to keep the hands-on stuff.
Design a storage system with labeled cabinets and shelving. Keep supplies organized so anyone can find what they need in thirty seconds or less.
I like clear bins for smaller items. You can see what’s inside without opening everything.
Lockable cabinets work well for expensive equipment or materials you don’t want walking off. It happens more than you’d think.
The goal is simple. When someone walks into your training room, the technology should fade into the background. It should just work without anyone thinking about it.
Phase 4: Implementation and Final Touches
You’re almost there.
The planning is done. The furniture is ordered. Now comes the part where your training room actually becomes real.
I know this phase feels overwhelming. You’ve got delivery trucks showing up at different times and a pile of cables that looks like spaghetti. But trust me, a solid checklist makes all the difference.
Your Execution Timeline
Start with furniture delivery. Get the heavy stuff in first so you’re not maneuvering desks around equipment later. Then move to technology installation. Save cable management for after everything’s plugged in (you’ll thank me for this).
The cables matter more than you think. Not just for safety, though trip hazards are real. It’s about walking into a room that feels clean. When cables are tucked away in channels or zip-tied behind furniture, the whole space breathes easier.
Sound Matters More Than You Think
Here’s what most people miss about set up training room ththomideas blockbyblockwest projects.
The acoustics.
You walk into an empty room and your voice bounces off every wall. It’s harsh and tiring. Sound-absorbing panels fix this fast. They soften the echo so voices come through clear during sessions instead of competing with their own reverb.
Mount them on the walls where sound hits hardest. You’ll feel the difference the second someone speaks.
The Details That Make It Yours
Now for the finishing touches.
Add a plant in the corner. Something green that doesn’t need much fussing. It softens the tech-heavy vibe and gives your eyes somewhere natural to rest.
If you’re thinking about your space long-term, consider What to Consider Before Buying a Home Ththomideas for broader planning insights.
Test every piece of equipment before anyone walks in. Click through presentations on the screen. Make sure microphones pick up voices from the back row. Confirm the Wi-Fi actually reaches every seat.
These small checks save you from scrambling when your first session starts.
Launching a Hub for Growth and Development
You now have the complete framework.
Planning, Design, Equipping, and Implementation. These four phases give you everything you need to set up training room ththomideas blockbyblockwest the right way.
I know how overwhelming it feels to start a project like this. You’re building something from scratch and the stakes are high.
That’s why this structured approach matters. It takes a complex challenge and breaks it down into steps you can actually follow. No guesswork and no costly mistakes.
You get a high-quality outcome because you’re working from a proven blueprint.
Here’s what you do next: Take this framework and start with Phase One. Get your planning locked down before you move forward. Each phase builds on the last one.
This training space will serve your team for years. It’s going to be a place where real growth happens.
You came here looking for a clear path forward. Now you have it.
The facility you build will become a premier training environment. That’s not hype, it’s what happens when you follow a solid process.
Start with the blueprint and trust the steps.